What is a webhook?
A webhook is a way for one system (like Fillout) to send real-time data to another system (like the 3rd party tools you use) as soon as an event occurs. Under the hood, a webhook is an HTTP callback and can be any of these requests:- GET - fetch something
- POST - create something new
- PUT - update something that already exists
- DELETE - remove something
Connect your form to a webhook
Link your Fillout form to a webhook
Click 
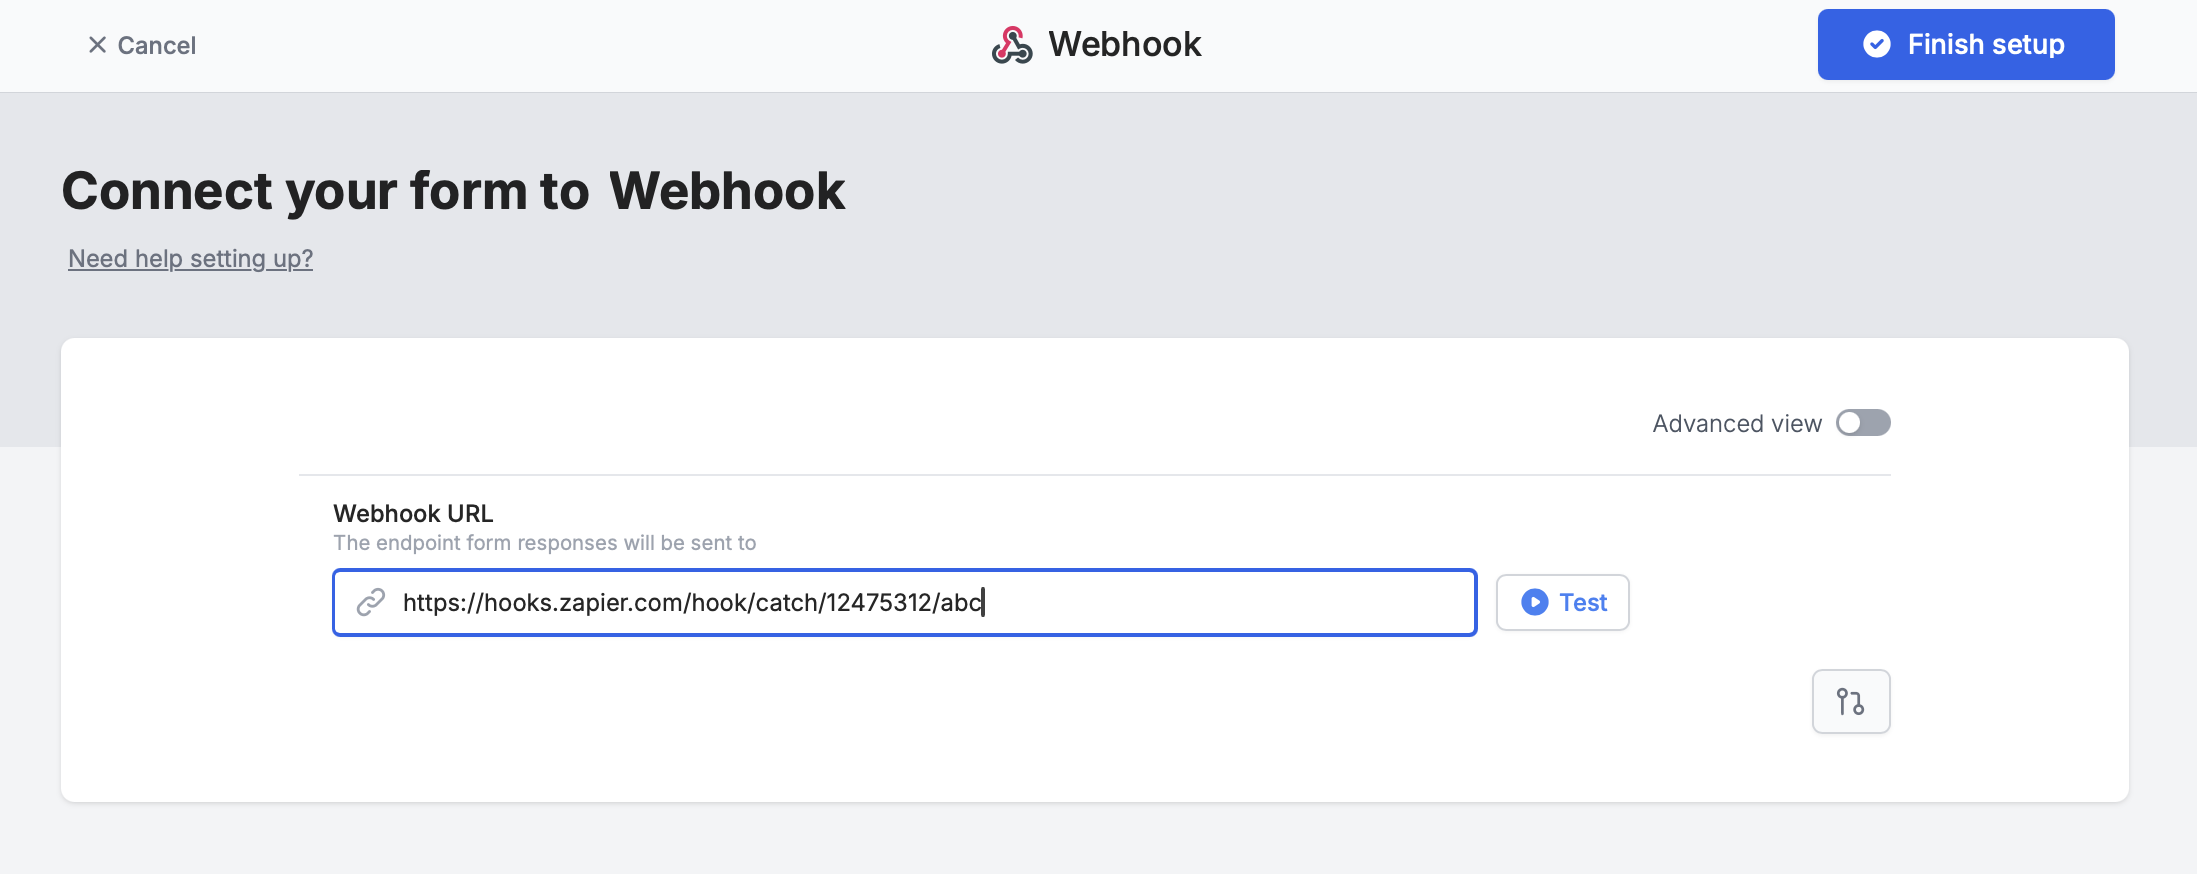
Integrate on top followed by Webhook.Test it. When you’re good with it, click Finish setup.Available webhook options
Toggle theAdvanced view switch to set up your webhook with any of the parameters or arguments you need.
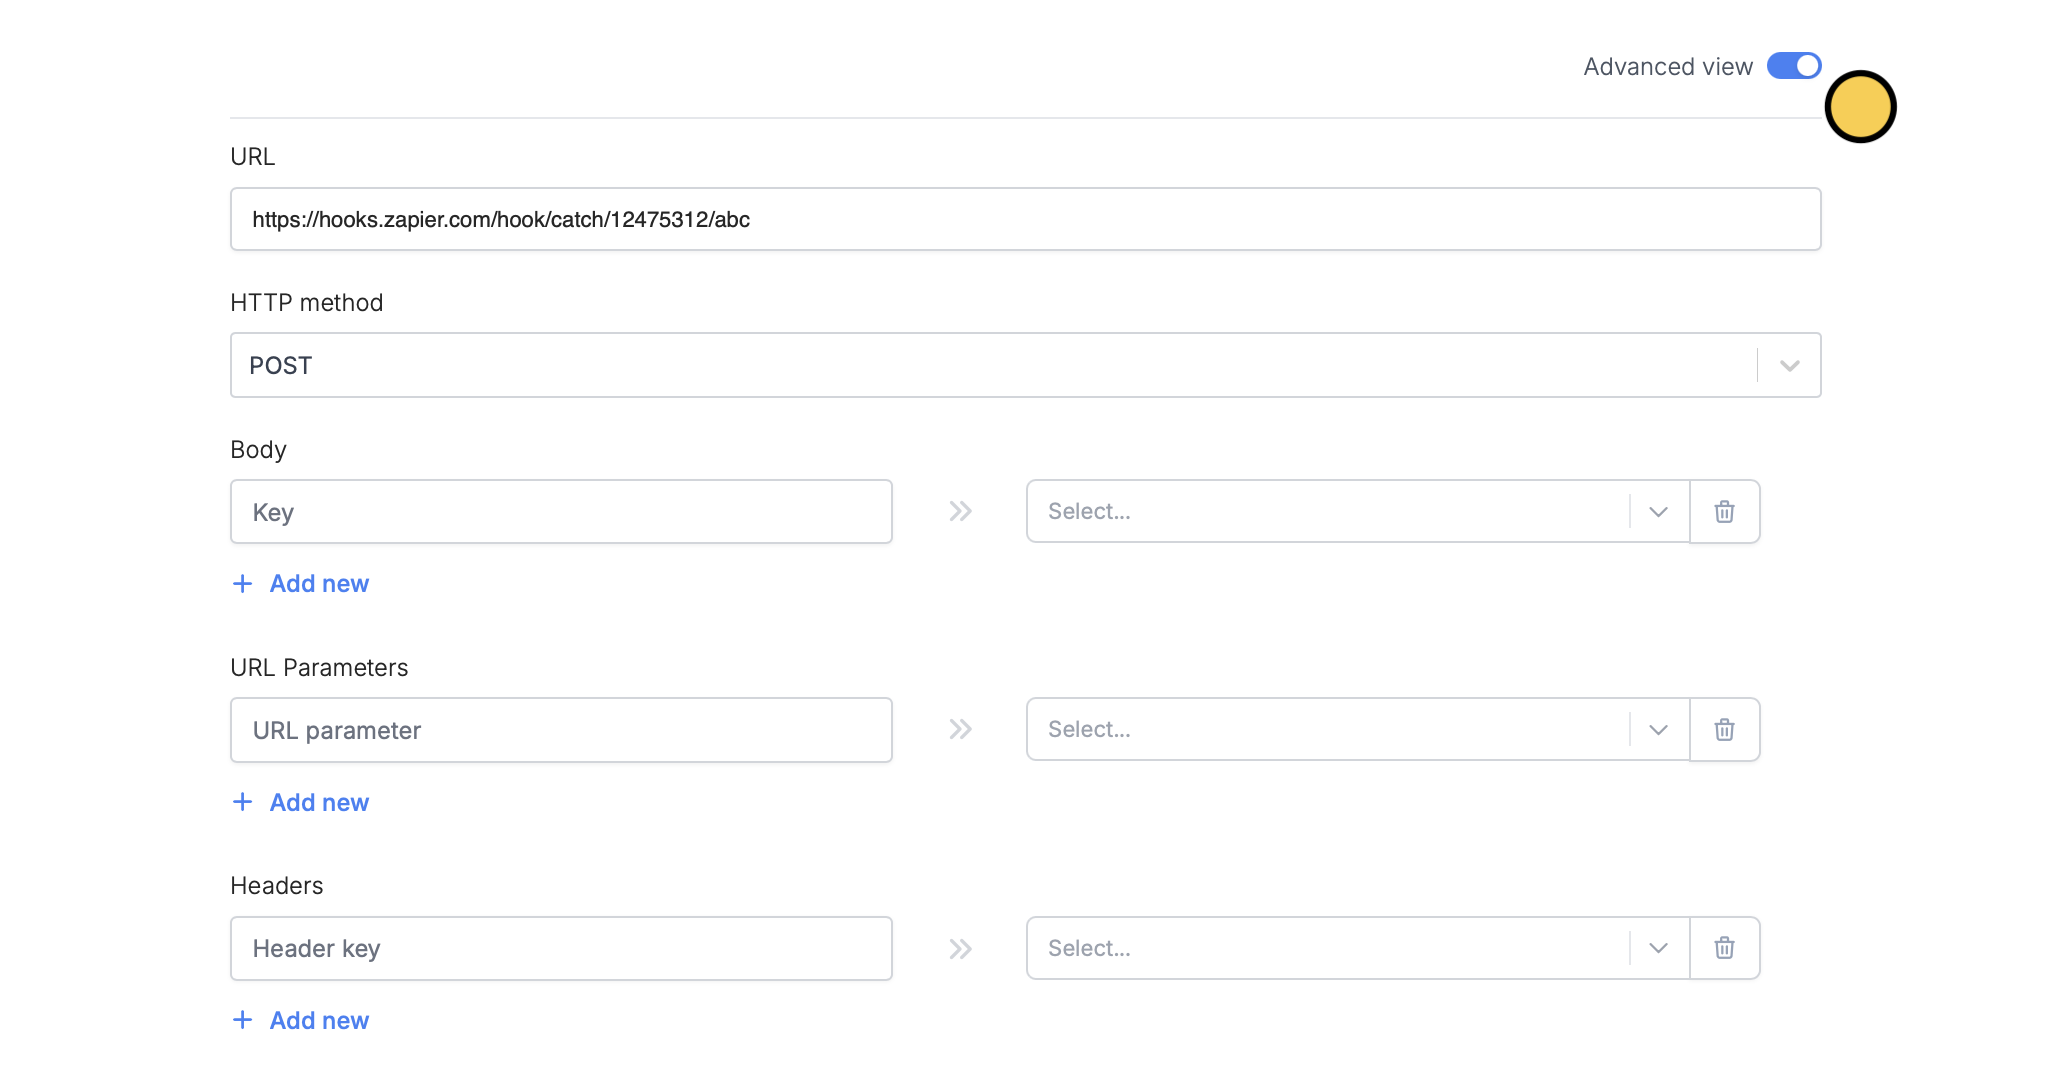
- This is used if you’re sending a POST request. Most of the time, services like Zapier and Make will accept either GET or POST, and you can send information in the body of the message if you prefer instead.
- If using fields in the body of the message, make sure to process these correctly in Zapier/Make to make sure that they’re coming in the body and not the URL.
- These get added to the URL at the end.
- The left-hand side is the key, and the right-hand side is the value from your form or from anything else you can reference in Fillout.
- For example, if you add, on the left hand side, source, and then on the right hand side, reference the field or question about this in your form, then your webhook will send:
- https://hooks.zapier.com/hooks/catch/12475312/abc/?source=answer to the short answer
- So if someone answered Facebook in the form, you will send: https://hooks.zapier.com/hooks/catch/12475312/abc/?source=facebook
- Most users will not need to use this section. This is typically if you have an advanced webhook setup which requires sending extra headers
- The most typical use case for headers is if you have some verification required for your endpoint, and you have a special key you want to send, which will look something like: Authorization —> Bearer <secret_token>
- Similar to headers, most users will not need to send any here.
Related articles
Automate with Zapier
Connect your Fillout form to hundreds of apps.
Populate dropdowns with a webhook
Load options from a REST API.